User Guide
Token Management
Tokens are API credentials — each token can have its own permission scope and quota limit
Tokens are API credentials. Each token can be independently configured with its own permission scope and quota limit. Click "Tokens" in the left sidebar, or visit /console/token directly.
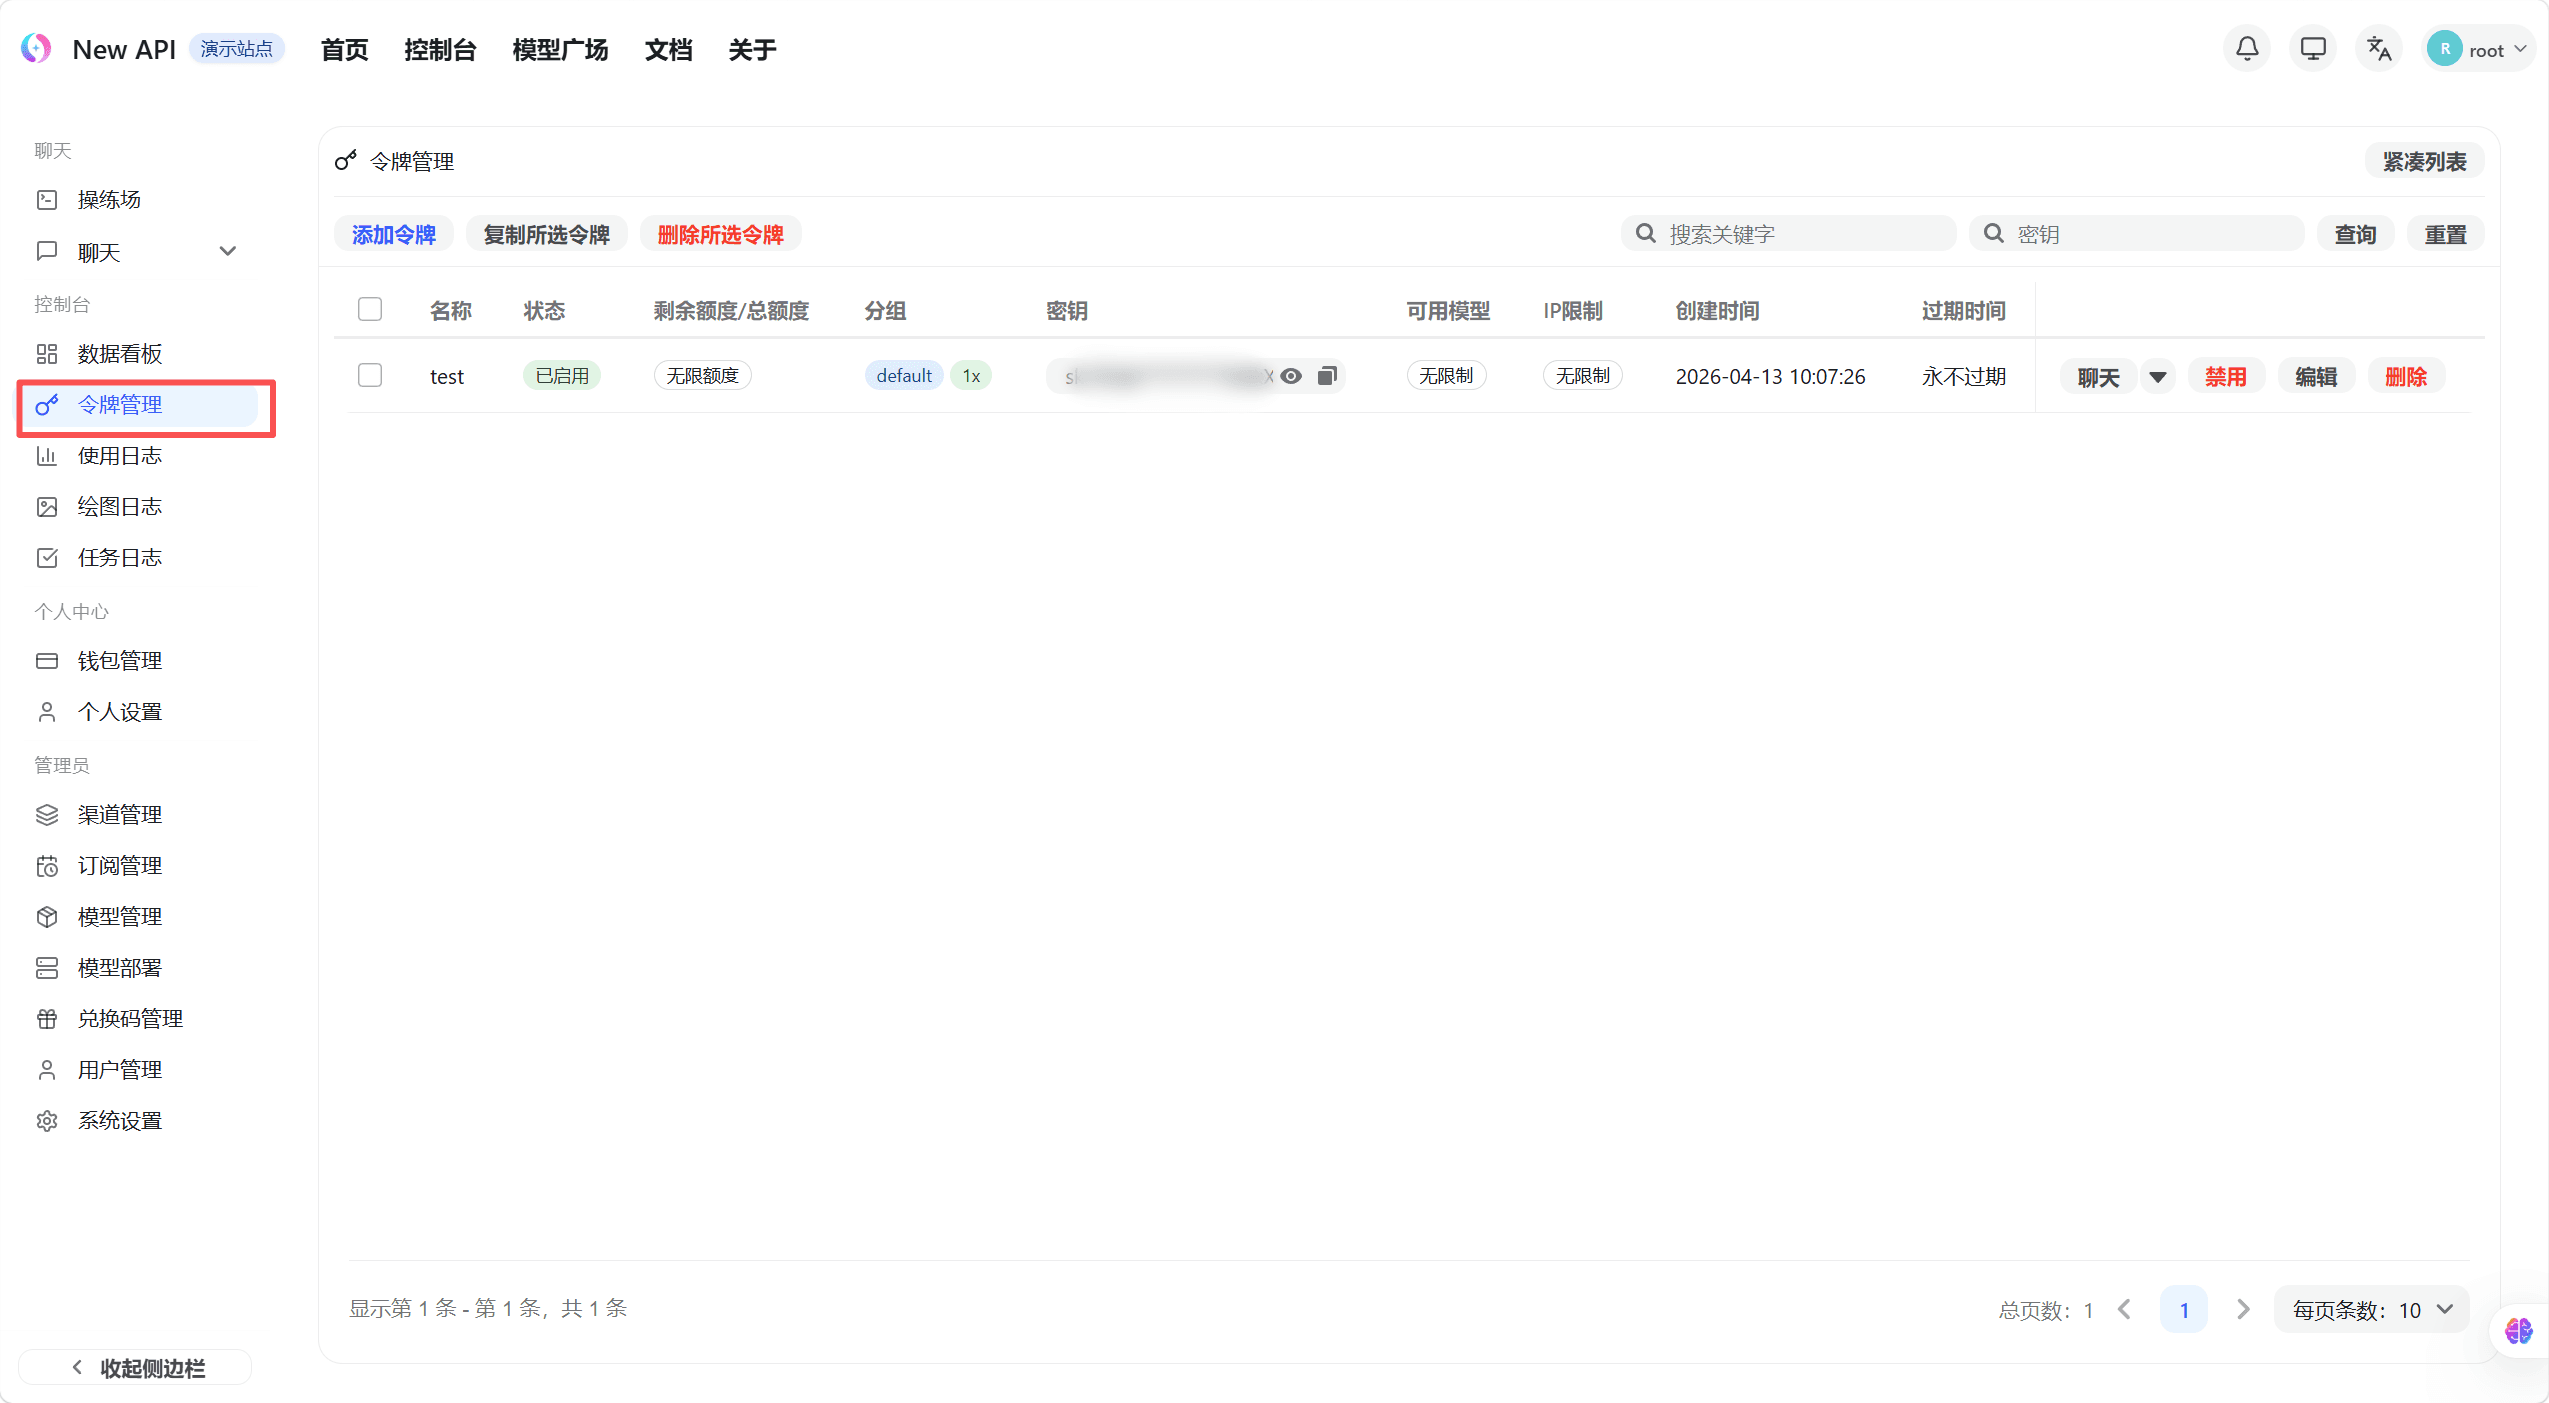
The token list shows all created tokens with their name, status, used quota, remaining quota, and expiration time.
Create a Token
- Click the "Create Token" button in the top-right of the token list page — a creation dialog appears
- Enter a token name (name it by purpose, e.g. "Production" or "Testing")
- Configure the following options as needed:
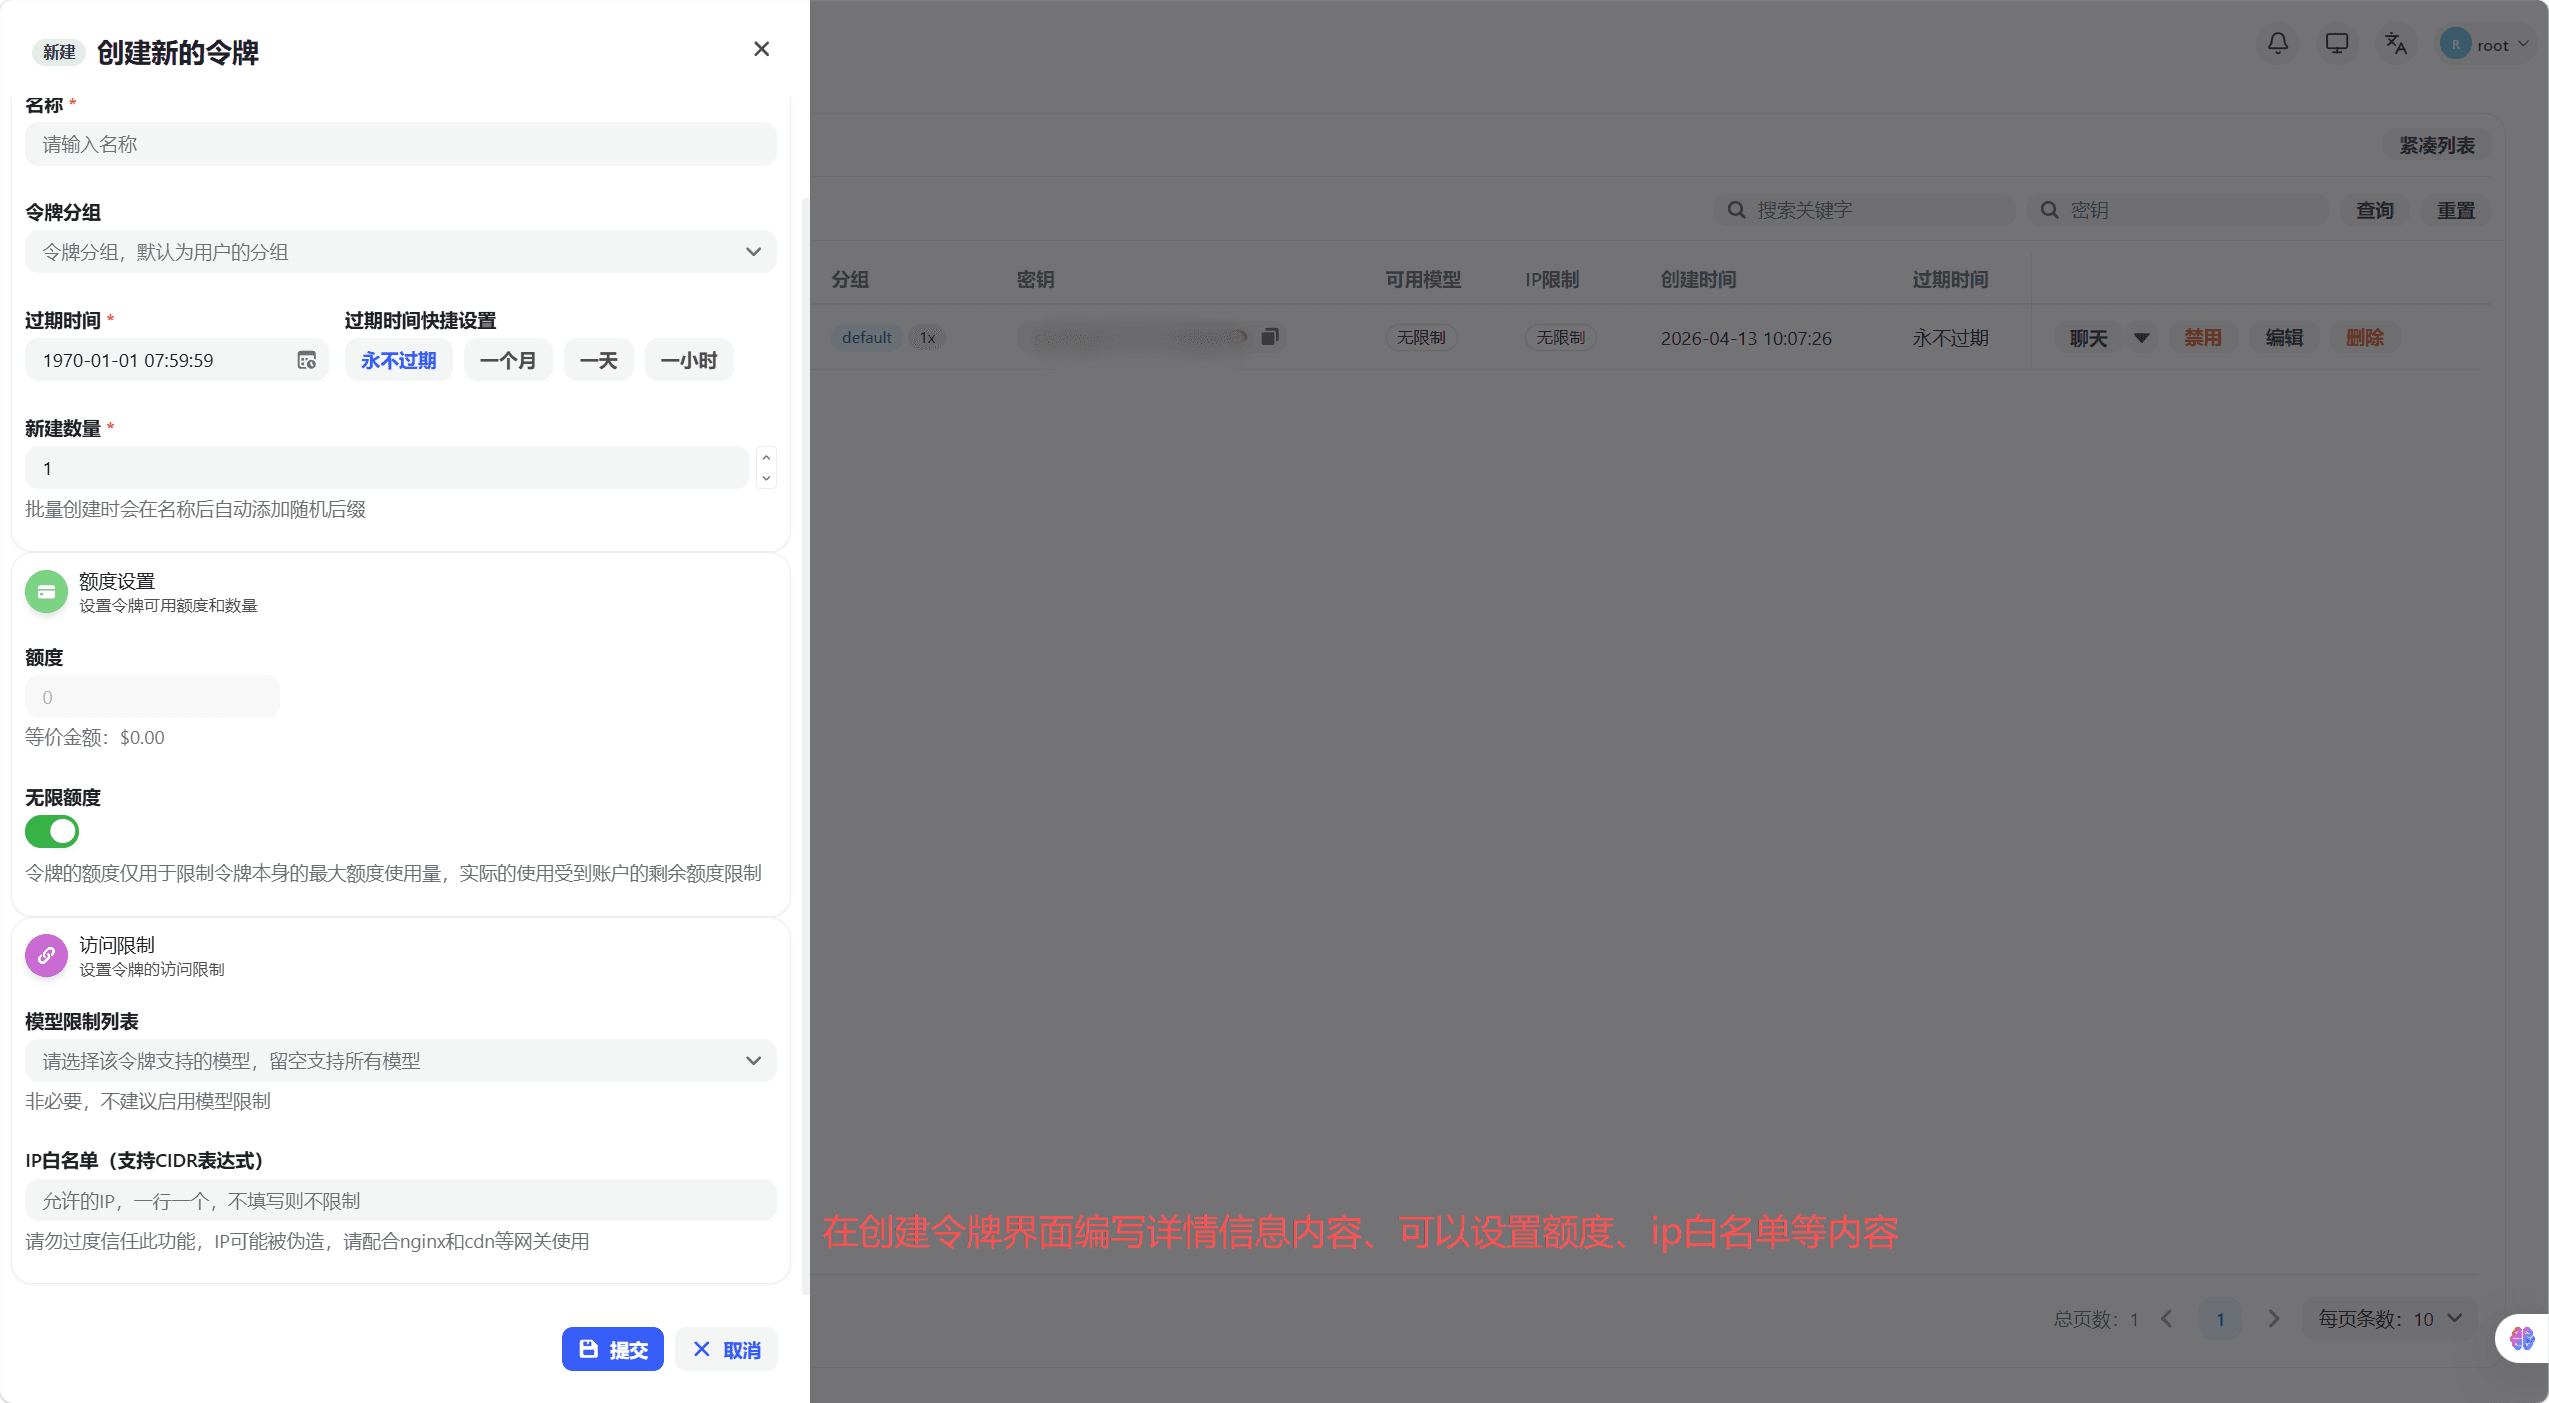
| Option | Description |
|---|---|
| Expiration | Set an expiry date; leave blank or set to -1 for no expiration |
| Remaining Quota | Limits the maximum quota this token can consume; auto-disabled when exceeded |
| Unlimited Quota | When enabled, no quota limit applies (still subject to account total quota) |
| Model Restrictions | Restrict this token to specific models; leave blank for no restriction |
| IP Allowlist | Restrict allowed source IPs; leave blank for no restriction |
| Group | Specify the channel group this token uses |
- Click "Submit" — the dialog shows the complete token key. Copy and save it immediately, as it cannot be viewed again after closing the dialog.
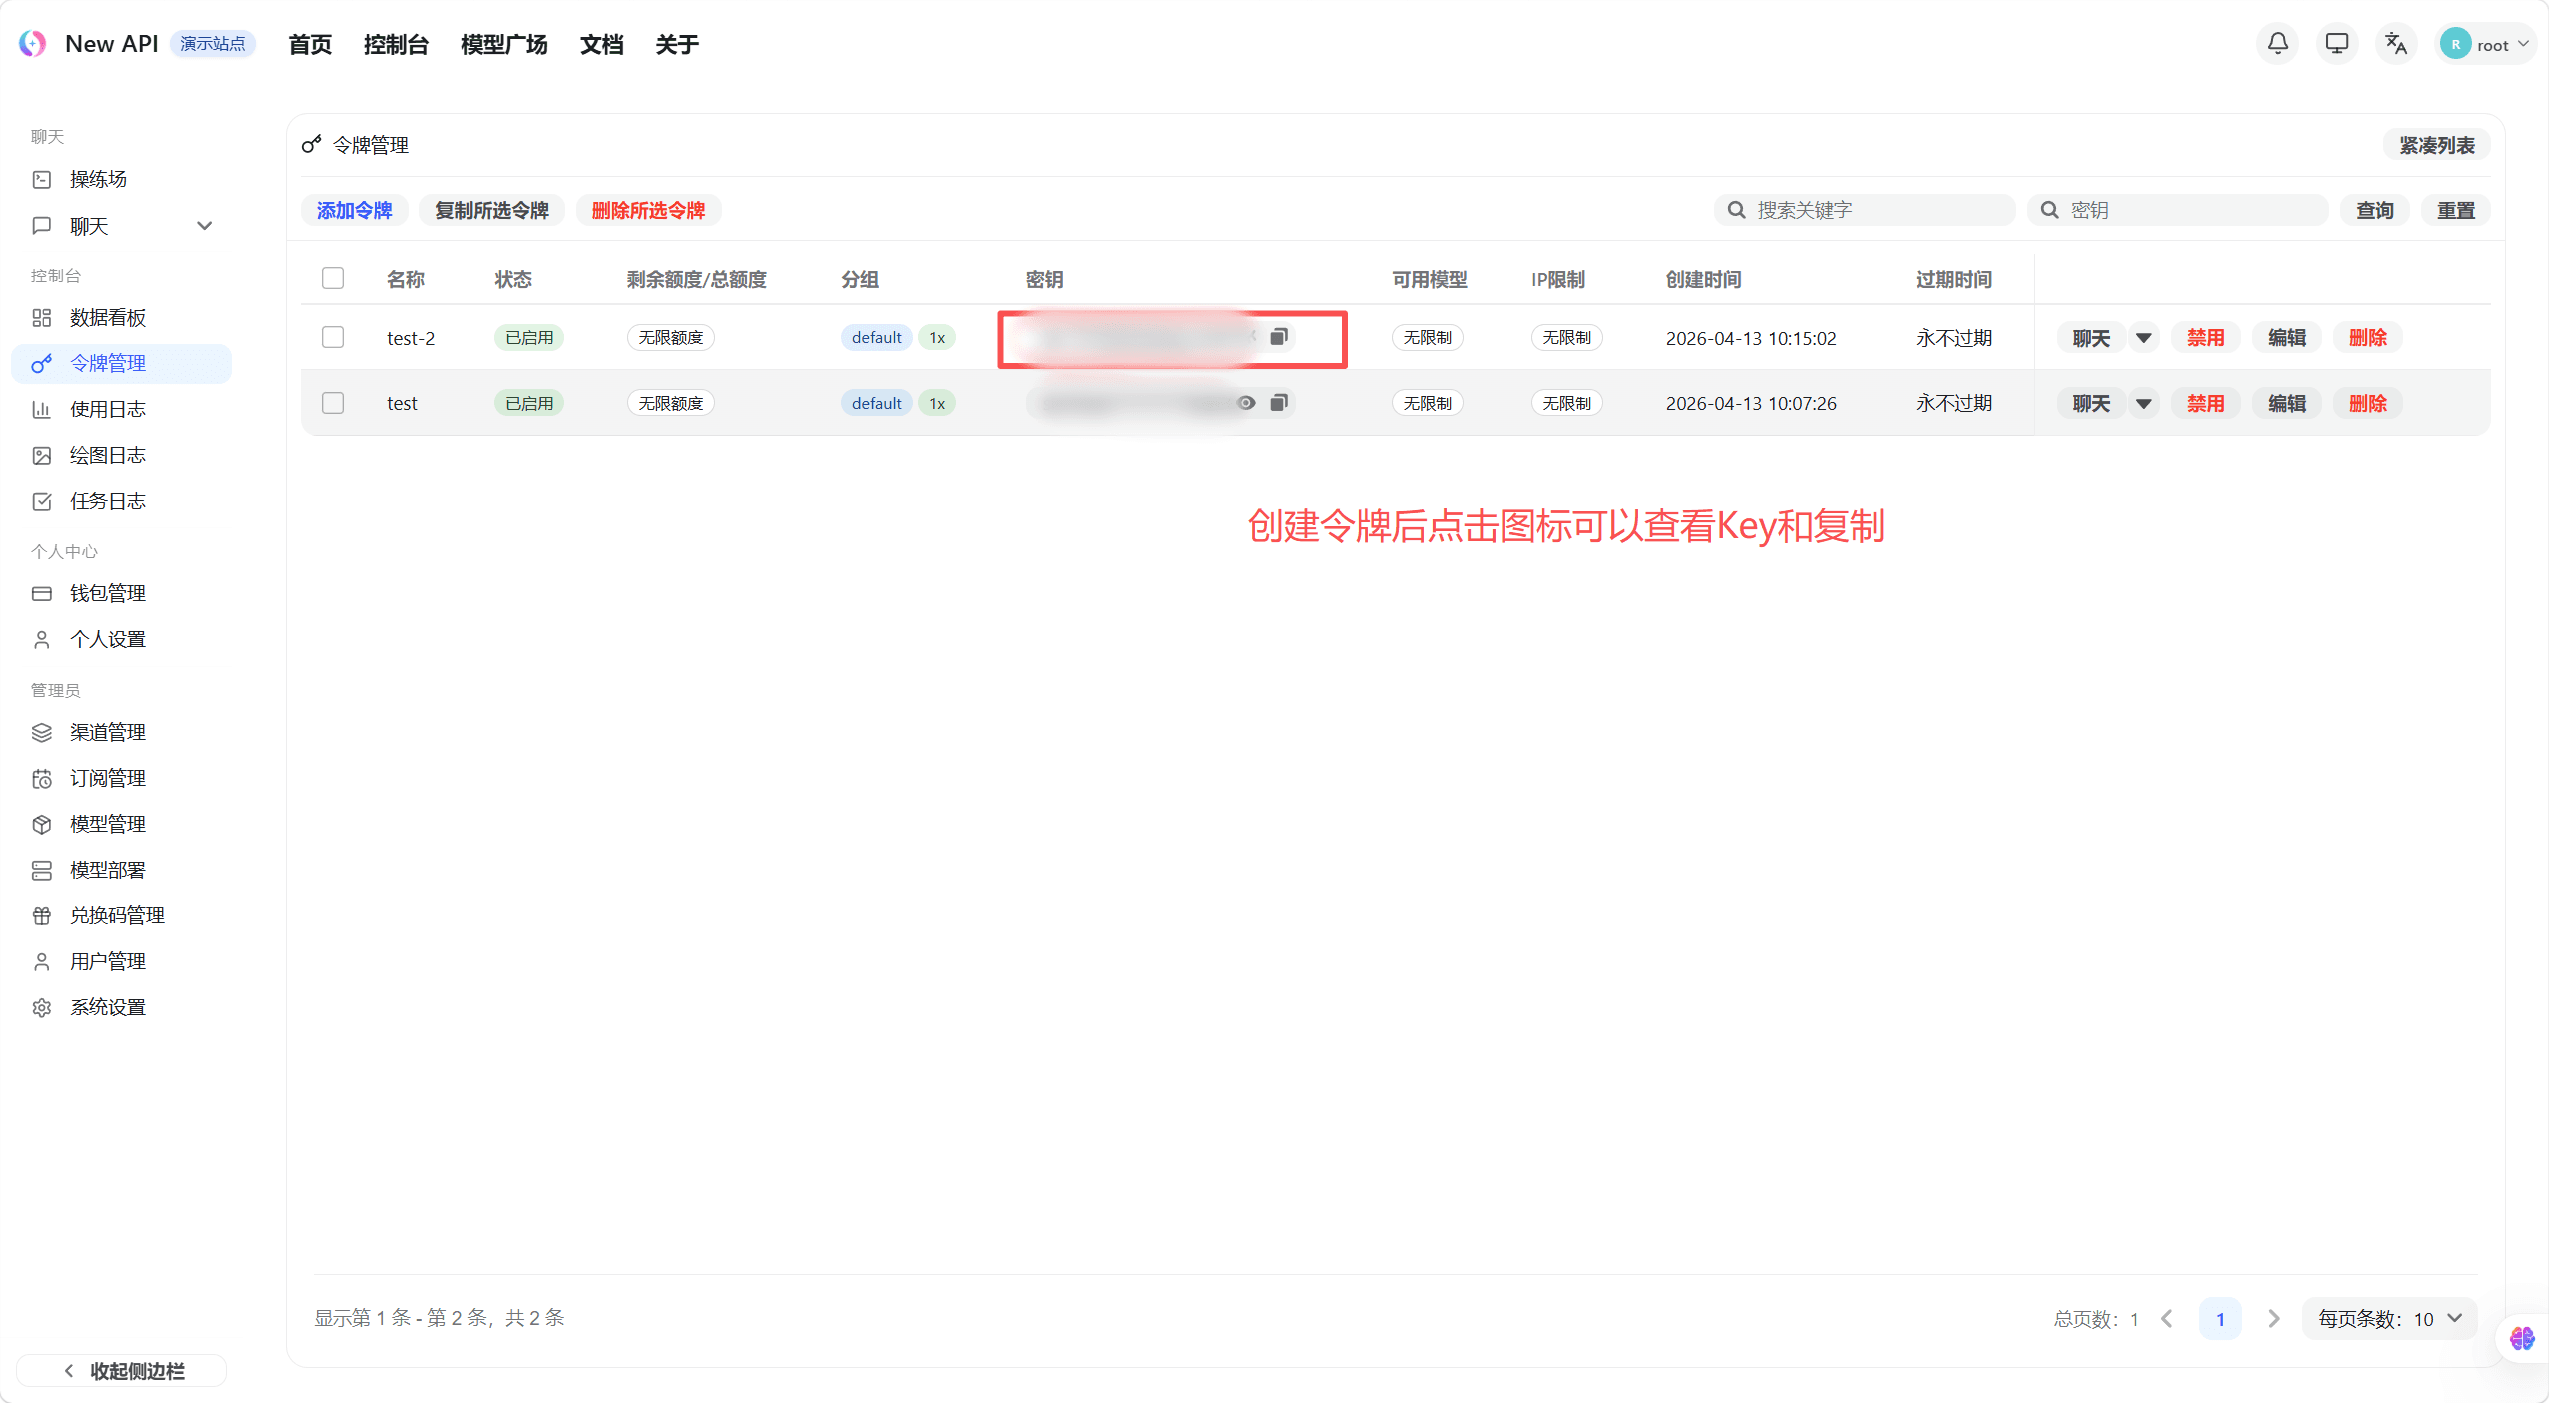
The token key is only fully displayed once at creation. Copy and save it immediately. Token keys have full API call permissions — do not share them with others or commit them to code repositories.
How is this guide?
Last updated on